Getting started: Setup of Leemons Free (and 2)
The free version of Leemons has a step-by-step wizard to create your virtual campus in less than 10 minutes.
Now, you are much closer: we are going to create subjects and enroll students, for that you will need to have on hand:
+ The subjects you wish to teach, the timetable and the teacher.
+ Some images and icons (in SVG format) to format the subjects.
+ The list of students you want to enroll (with their emails, names, surnames and dates of birth).
You can also upload their profile pictures or they can add it later from the campus.
Step by Step
Create subjects
Subjects are the areas of knowledge in which teachers provide training and in which you will enroll students.

To create a new subject click + New subject and a side window will open to enter the subject data: name and identifier.
In addition, you will be asked for a subject color, a cover image and an icon in SV format, which will make it easier to locate in dashboards, data tables, evaluation notebooks, etc...
If you need to find resources, you can find free images at unsplash.com or pexels.com and icons at thenounproject.com.
Next you will have to assign a teacher from among the users you have registered in the previous step.
Configuring the subject
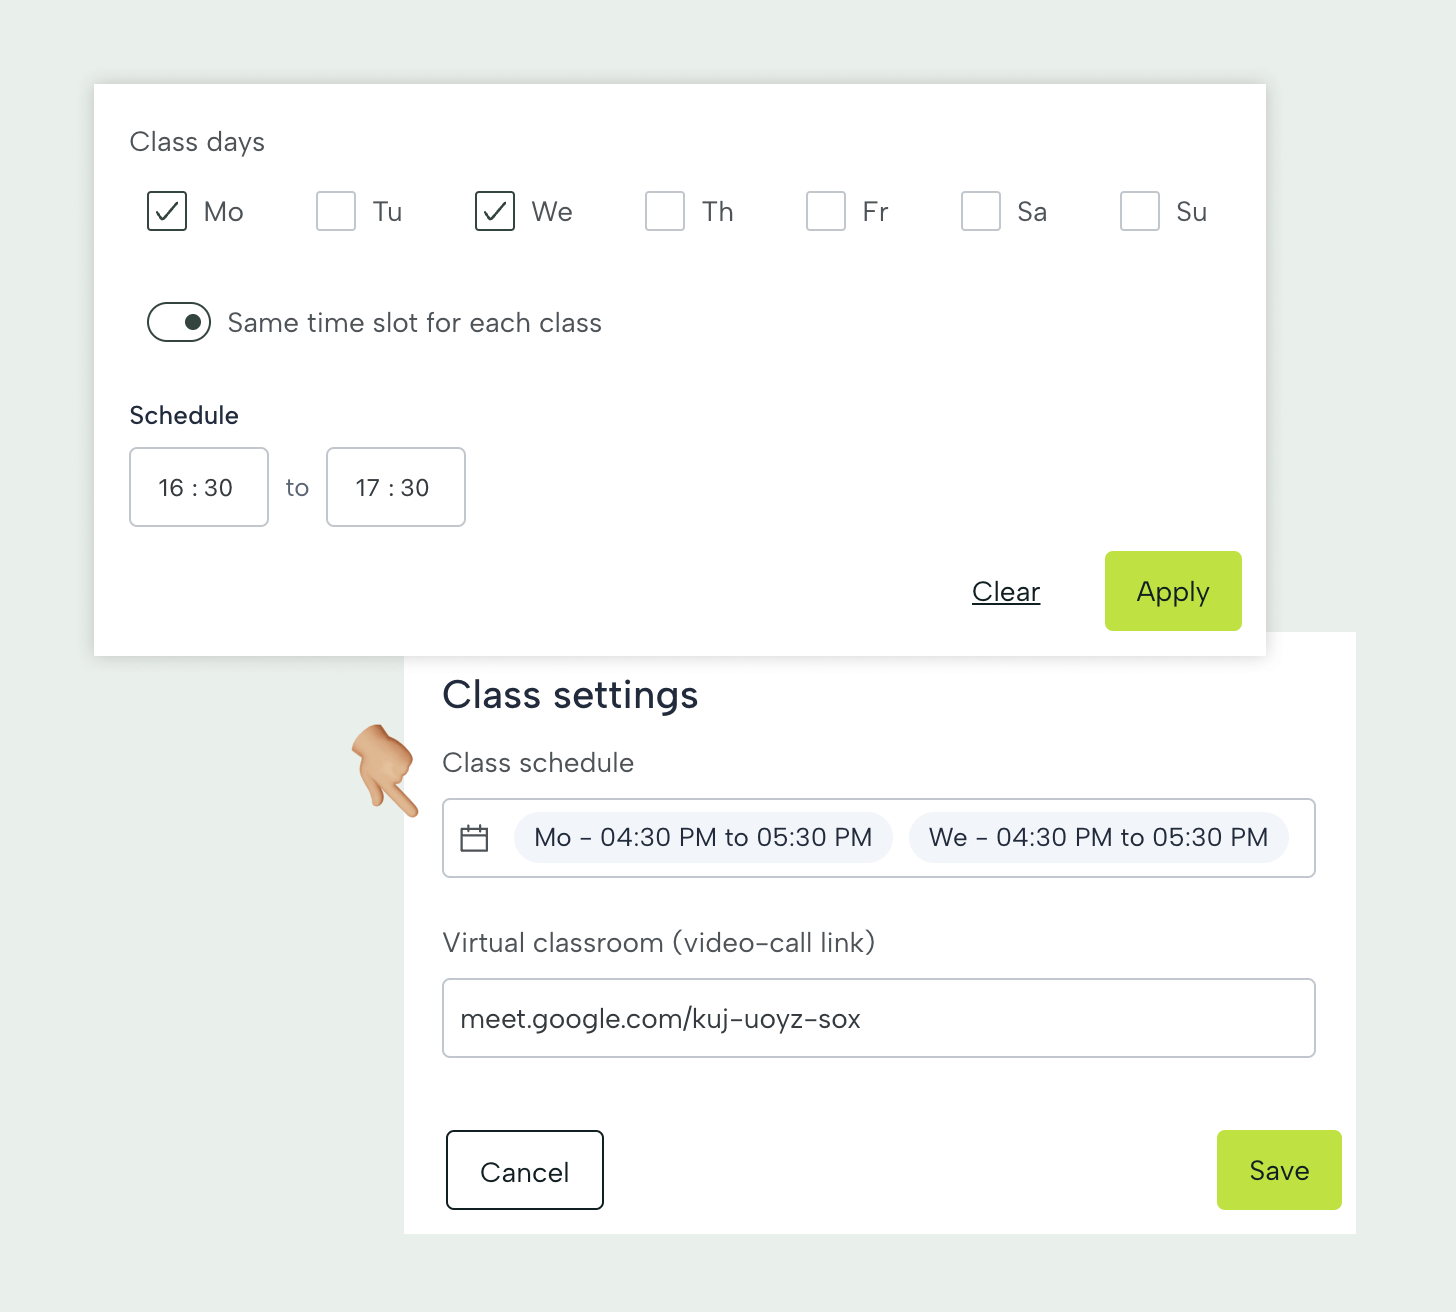
To finalize the configuration of the course you will be able to indicate a timetable and, if necessary, the web address of the virtual classroom (Meets, Zoom, Teams or other).
Limitations
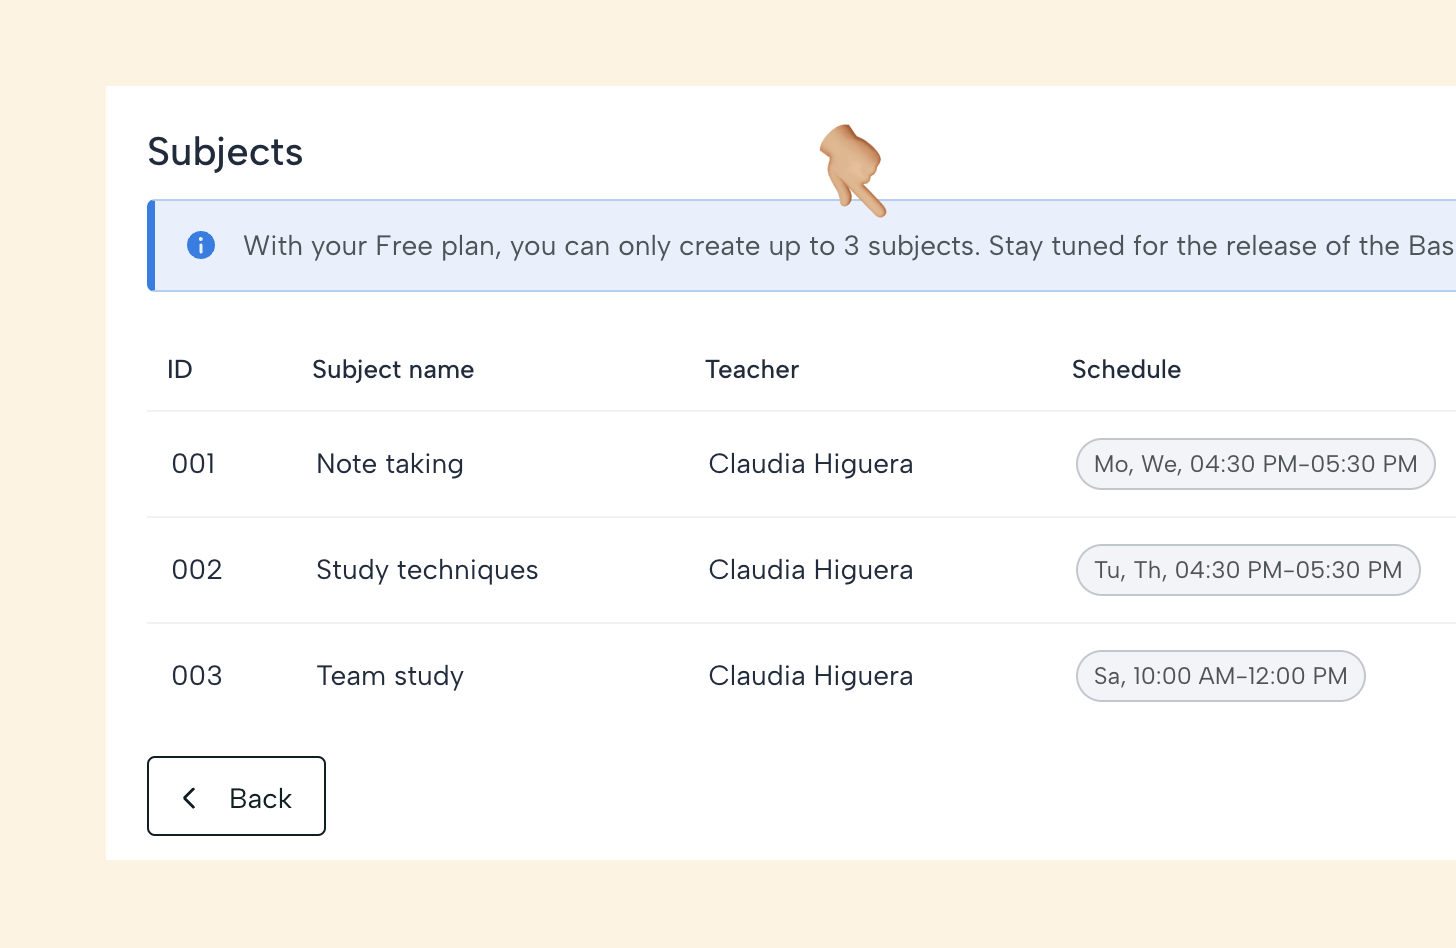
Remember that with the free Leemons plan you will only be able to create 3 subjects and 6 teachers.
Create students
It's time to add students to your class. With Leemons' free plan you can add up to 50 students and enroll them in the subjects you need.
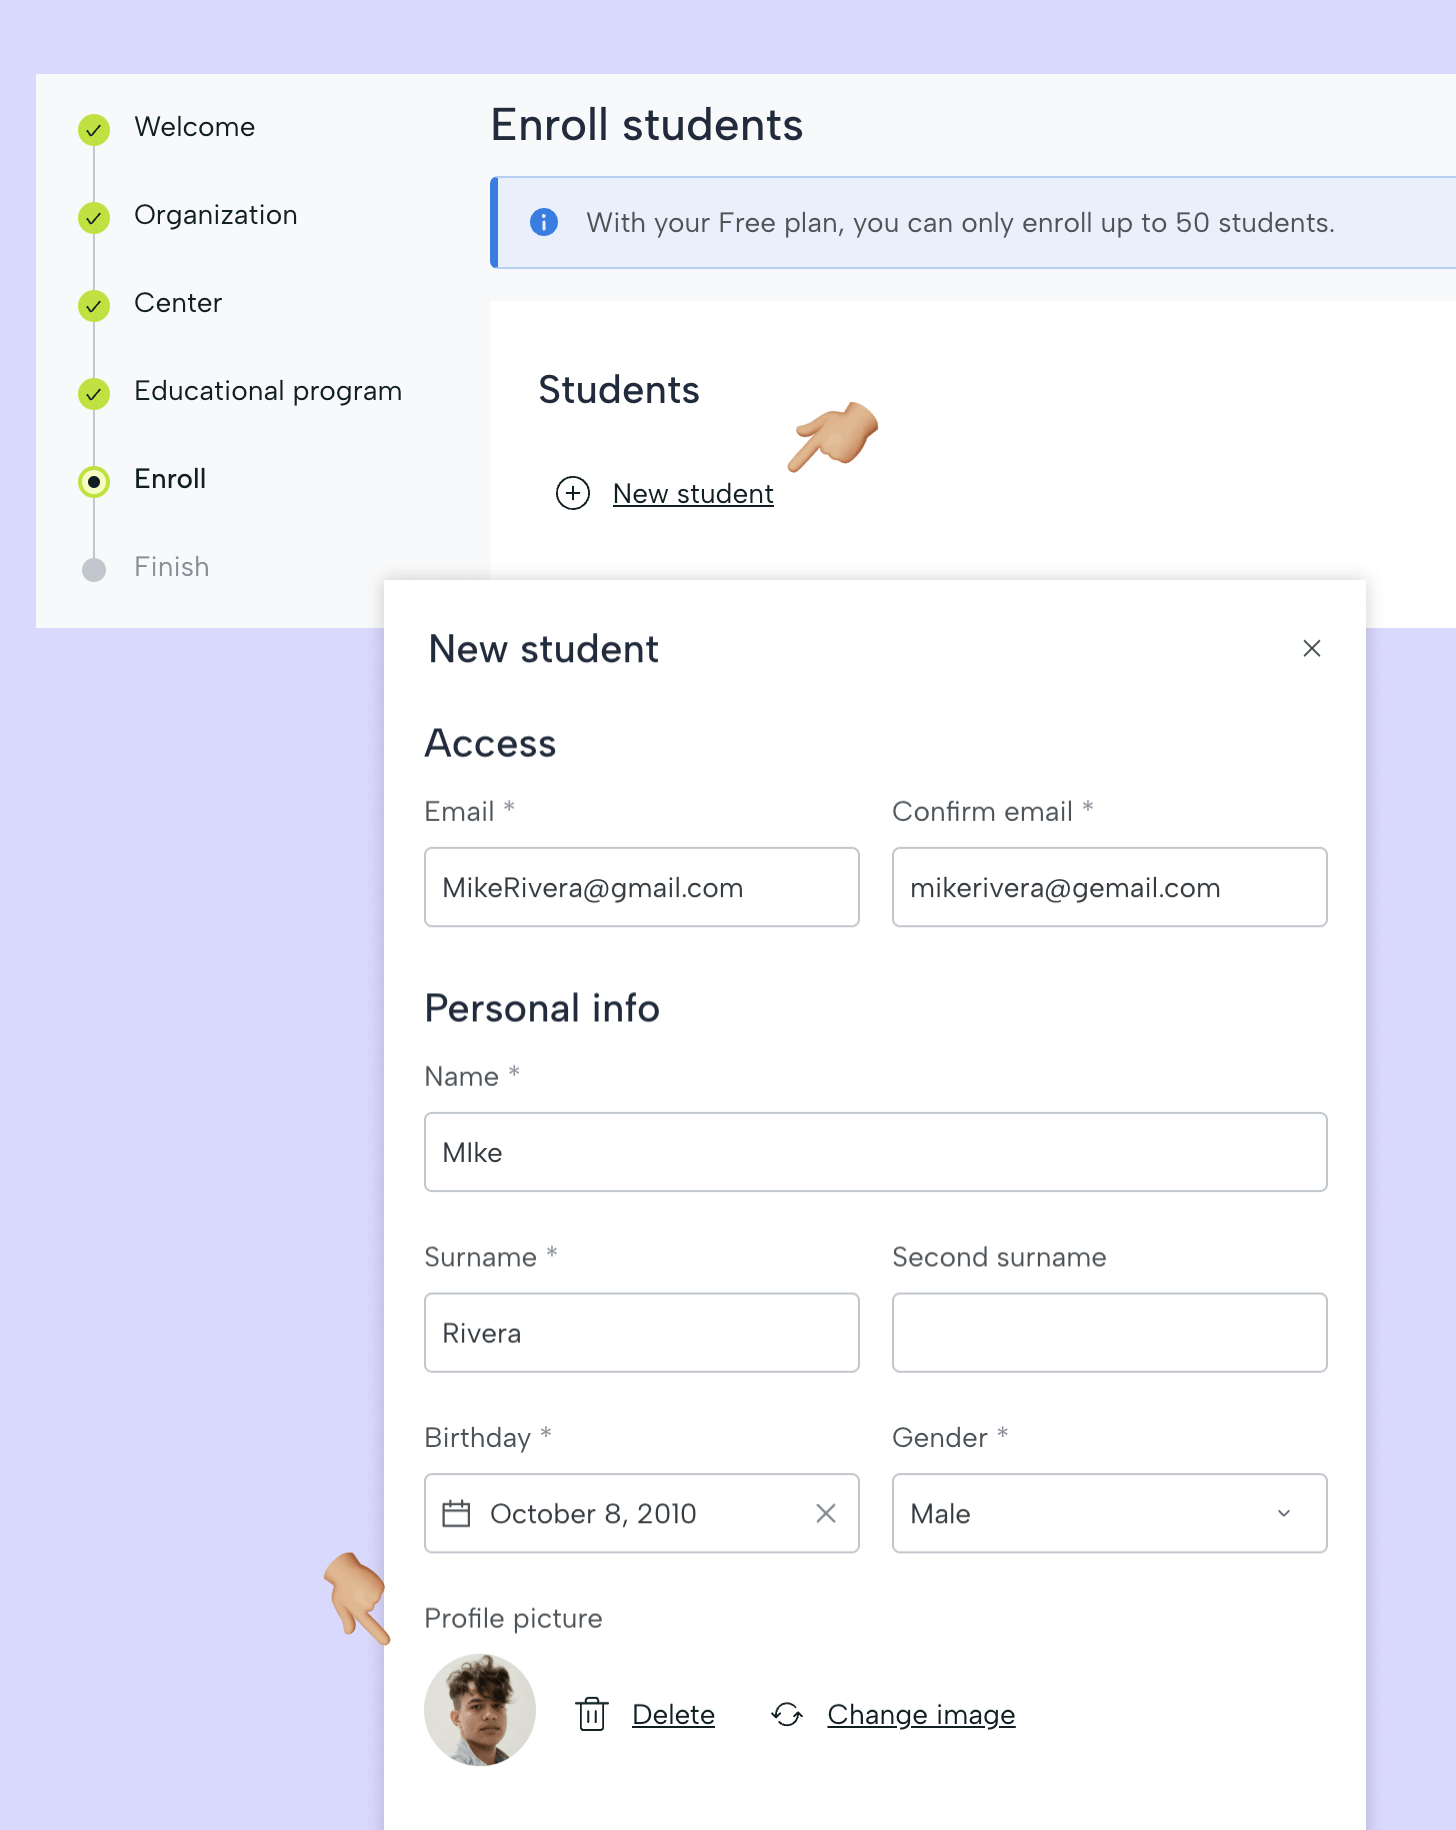
To register a student you will need to fill in their user data: first name, last name, email, date of birth and gender.
At this point you may or may not upload a photo that will be your avatar on the platform (later the user can upload or modify it in your profile).
Enrroll students
In order for students to have access to training on your platform, you must enroll them in a subject.
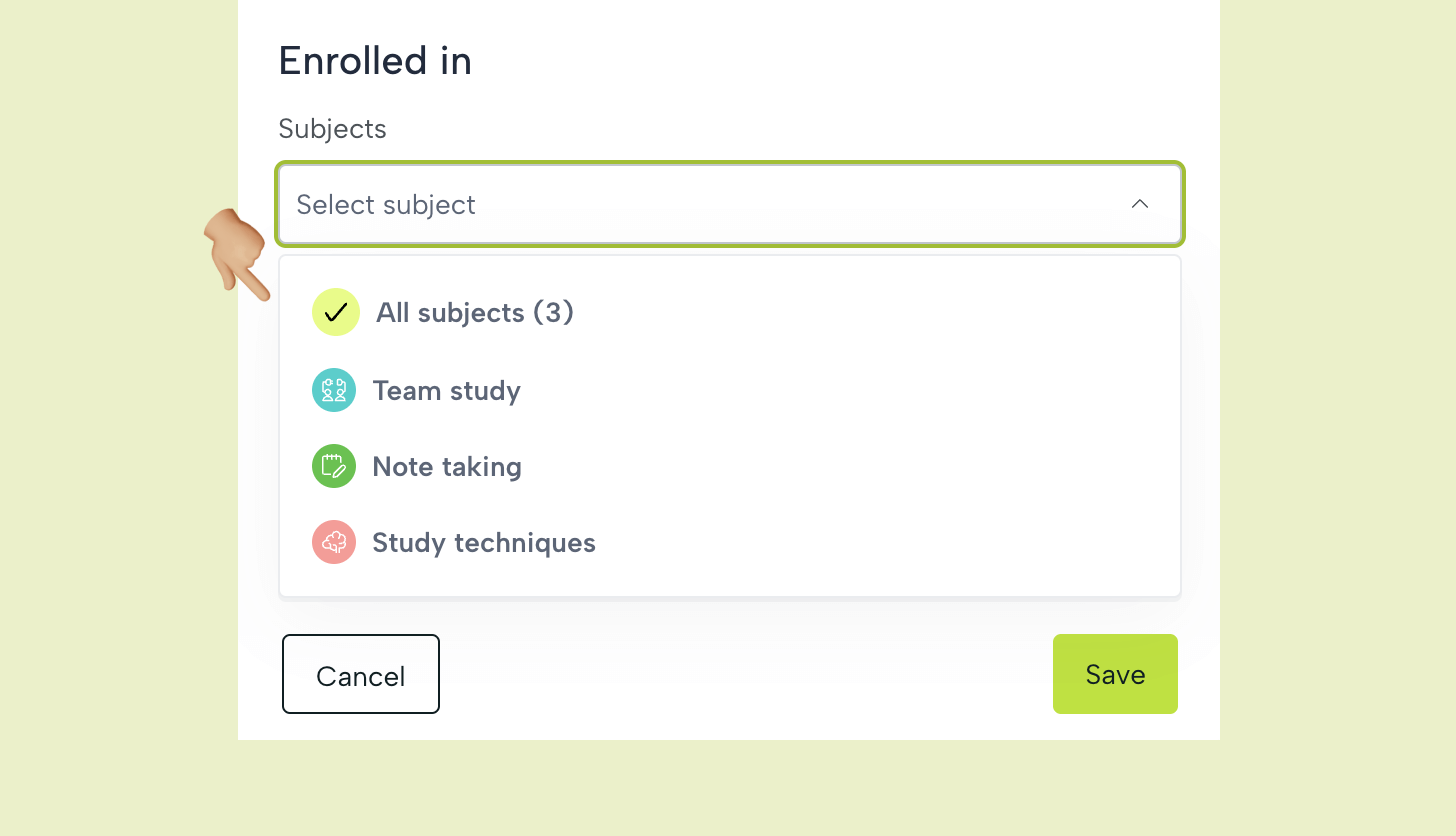
To enroll students in the subjects you only have to select them from the list below.
If the subjects are compatible (they have non-overlapping schedules) you can enroll them all at once in all the subjects you offer.
If there are overlaps, the system will show you the incompatibilities when you select a course.
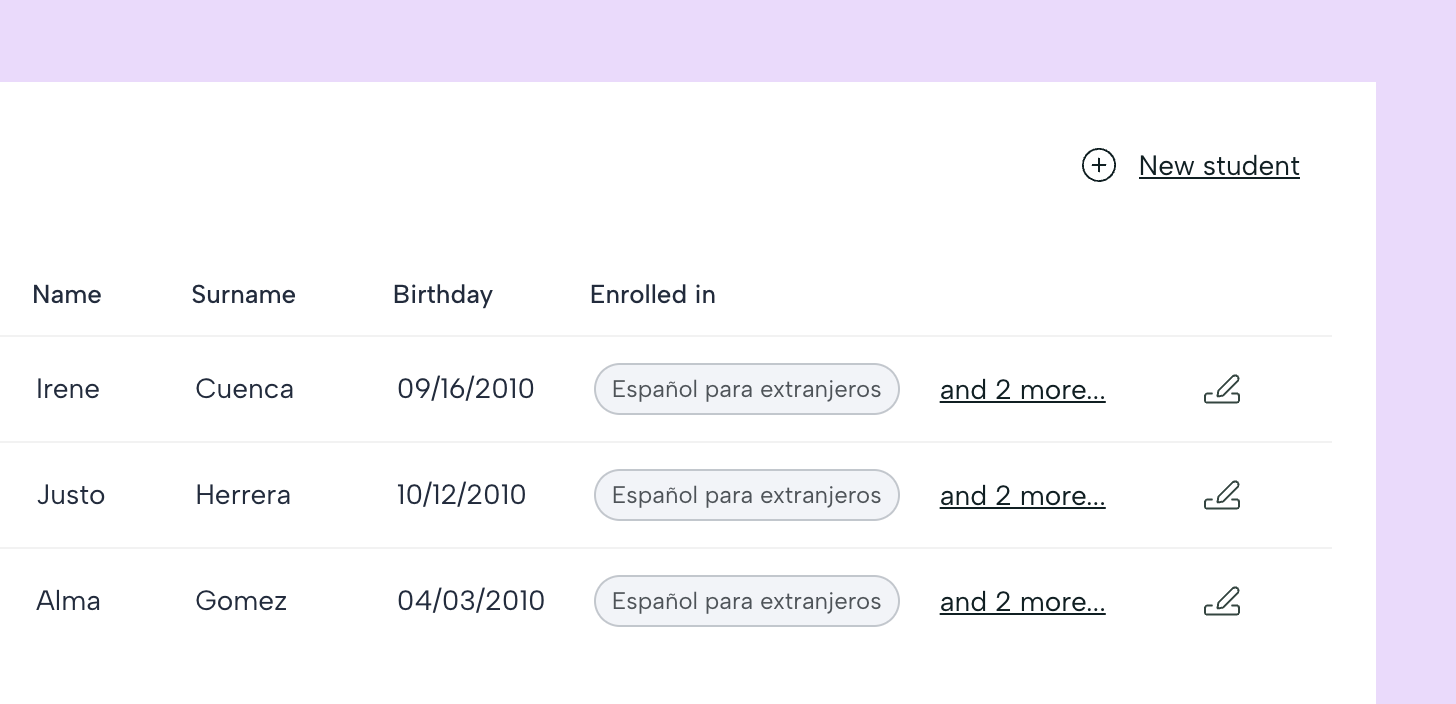
List of students
As you enroll students, you will be able to see on this page the users and their enrolled positions. To make changes click on the pencil icon in the student's name line.
End of configuration
When you click the continue button in the student registration you will access the summary of your installation.
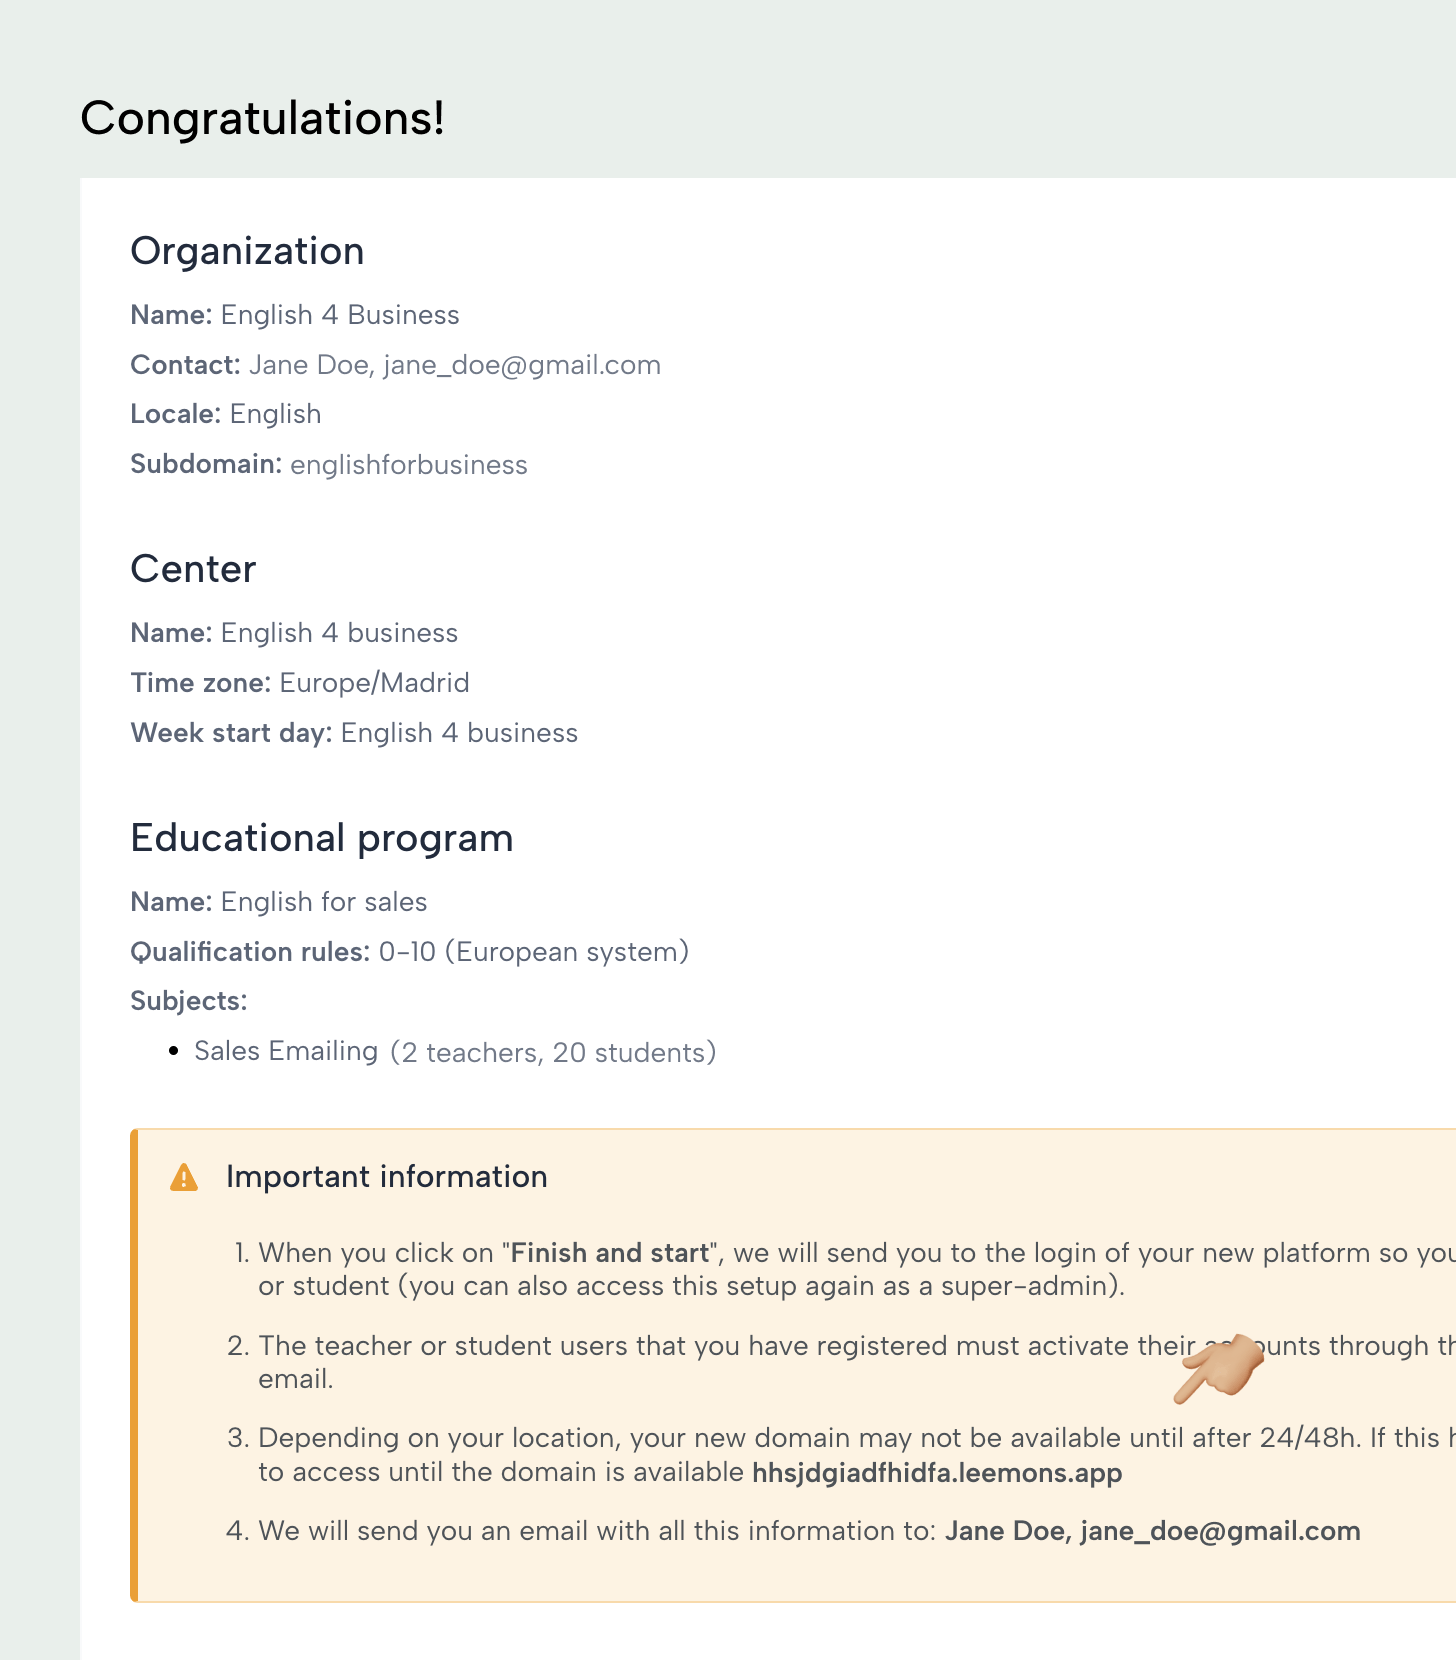
Here you can see the URL of your campus, the admin data and a brief report on the number of users on each periphery (student and alumni), as well as the number of assignments completed.
We will also provide you with an alternative URL (internal to Leemons) that you can use if you need to test before the DNS has propagated (i.e. while the official name of your campus is not available). Both URLs belong to the same installation and can be used interchangeably.
To complete the installation, click on the Finish button at the bottom right of the screen.
